Sending Love


So it's Tuesday ... and i actually thought it was Wednesday and that the deadline over at CAS Colours & Sketches was tonight so because of that i had a sparkle of inspiration. A couple of weeks ago i drew and water coloured with distress inks this image from a picture i saw on Pinterest (can't find the link right now, sorry). 

Because it was a large illustration, i decided to stick it on the inside of a card after trimming it down a LITTLE. :P Given that the inspiration came from the challenge, i had to incorporate the 3 square in my card composition and thus these 3 windows were born.  Compared with the original sketch, i horizontally flipped the squares to fit a little better my illustration. 

The card base was really thin so i stuck on the backside another piece of watercolor paper which has the same texture as the illustration on the other side. It also gave me the necessary hiding spots for sticking the vellum which serve as windows.


After i came up with the sentiment and drew it on with a permanent fine-line marker both on the cover and on the inside i felt the card lacked something, and therefore i drew these corner doodles you see in the pictures. At the point of each doodle corner i added sticky pearls. It feels so elegant this way. 


In order to tie the inside with the outside together, i draw and painted with the same colors 3 different sized hearts, which i cut and then mounted on foam squares. 


Sorry for the long post and many pictures but i felt this card deserved a little bit more love in order to be able to show you all the features. I absolutely adore this card and can't wait to send it to someone special. 


As stated above, i am entering this card in the CAS Colours and Sketches Challenge 124: Sketch. 


Thank you for visiting my blog,
Have a wonderful evening,
Teodora

Friends are Sunshine


While browsing around the challenges that came out this week, one really inspired me. I am talking about the Less Is More Week 224 Challenge "Hello Sunshine". 
Therefore i decided to create a Rays of Sun stencil, given that i didn't have any, so that i could use it with distress inks and create this sun. 
I have also created a tutorial which you can find it here in where you can see how i created my stencil with low cost materials that everybody may have lying around.
I have also used a written words stencil that i bought in a pack of 4 from Panduro and daubed with Spiced Marmalade. The sun and the rays are Mustard Seeds. Then i used a piece of orange ribbon to create a delimitation and proceeded to writing my sentiment. 

As it is obvious, i will also enter this card in the Less is More Week 224 Challenge. Another challenge i will enter my card in is ShowCASe Your Style Challenge #15: Friendship.

Thanks for stopping by,
Have a wonderful sunny weekend, 
Teo

Mom's Birthday Card


Heya all,

As i was saying in the previous post, i have decided to create another card for my mom's birthday using the same stencil. This is the result. I used a different set of papers which i can't remember where i downloaded on the internet (sorry for that) and black cardstock on white card base. The sentiment i wrote on a piece of vellum and embellished it at the end with several holographic sticky crystals. 

Today was short, i know ... but all i can say is that i adore this card and how it turned out. 

I will be entering this card in the Virginia's View Challenge. Virginia has created this challenge with a special prize in mind. A Craftsy Card Class Giveaway. She has also included in her post a FREE Class from the Craftsy page. I have already seen a couple of videos from that class and i loved this idea for the gift card pocket in your cards. Looking forward to seeing the rest! :) 

Thank you for visiting my blog,
Have a great weekend,
Teo

Tillykke!


... which means Congratulations! in Danish. 

Today a colleague of mine asked me to make a birthday card for one of her friends. I really loved that someone asked me that and therefore here it is. I just couldn't wait to get home so i could make it. 

In the last couple of weeks i have been looking at this Iris Folding technique which is basically stacking folded (in two) thin pieces of papers in a certain order to create a spiralling effect. On Pinterest i found this wonderful pattern which went great with the person my colleague wants to give this card to. 

I was a bit afraid at first on how was i about to cut the pattern out of my white cardstock but my craft knife did the work just great. After that i printed out a couple of papers i found on PaperCraft Inspiration blog and cut thin strips of each. I proceeded to layering them as the instructions said and voila!!! ... 

Given that i still don't have any stamps ... the "copy from my laptop's screen" technique for the writing went just great. As finishing touches i added Sparkling Stickles to all the dots in my sentiment and a sticky sparkly gem in the middle of my Iris's heart. I have also drawn faux stitches around my heart because i felt that my patterns were just losing themselves in the white of the card base. 

Finally, i cut the extra pieces of strips sticking out from behind my card front and added foam dimensionals to where i didn't had any layers of paper and sticky red tape underneath the pattern. Adhered to my card and it was finally done. 

I am so happy the way it turned out that i am thinking to make another card for my mom as well, given that her birthday is rapidly approaching and i feel that what i did for her 1 month ago just isn't her. 

I would also like to enter my card in the following challenge:

Thank you for the visit,
Have a wonderful evening,
Teo

Father's Day card


So here it is, finally! The mystery background i did a week ago. I simply love this background. The color inspiration came from a  Seeds color swatch and it is watercolor on watercolor paper. After it was completely dry, i added Sparkling Stickles to every intersection, therefore it has a discrete sparkle when you look at it. 

Later this week my Martha Stewarts Circle Cutter arrived and i was (and still am) super excited. Therefore i cut this side circle on my watercolor piece and decided that it will have a hanger with some ties as i envisioned it made for my father, on fathers day, which btw, i have no idea when it is. Growing up in Romania we didn't celebrate it. 

The hanger is made using an embossing pen and Black Glittery embossing powder from Ranger. As for the ties, i put done the colors i used on a different watercolor paper and after they were dried, i took a hexagon patterned stencil and added appropriate color Distress Inks with my mini distress ink pads. Then i proceeded to cutting small ties with my craft cutter and arranging them the way i thought suited best to this card.

After i adhered the ties down, i decided i needed to conceal the small edge on the hanger and used some sticky black gems which i think work great. In order to tie the background to my focus piece, i used Sparkling Stickles on the intersections of the hexagonal pattern (which you can't exactly see it) as well. 

For the sentiment, i used my Circle Cutter and cut an outside edge of about 1 in, and wrote with a white gel ball pen, Happy Fathers day. I also used the same black sticky gems in between the sentiment and on the edges so that it would have a connection with the focus piece and serve as concealing points for my dimensional foams.

I would also like to participate in the Challenge #134 from Crafty CardMakers called Make your own background.

So here it is, the card for today,
Thank you visiting my site,

Teo

Weekend update

Hello again,

It is 2:29 Tuesday early morning and i wanted to give you an update on what i did this weekend. I am still waiting on my Martha Stewart Circle Cutter which will arrive tomorrow therefore this weekend i only got to create a bunch of backgrounds for my future cards. 


It wasn't easy for me to start painting and playing with watercolors, but ever since i started i can't stop. I have also incorporated distress inks, and i only have 4 colors so far but i am starting to feel the need to get some more. Maybe some green and/or purple.


In the picture above there is one other background missing that was still drying so couldn't make it to the photo session. But i still think it's the best one yet. I have also experimented with resist embossing and some "free-hand" painting based on an image that i found on Pinterest and really caught my eye. 


And yeah, Pinterest really became my new tool of trade, providing me with tons of inspiration and new techniques to try. I am also trying to follow color combos in order to step out of my Rainbow comfort zone and create more themed cards, with different feels rather than just Joy all the way. 


Nevertheless i leave you now, going to bed.


Have a wonderful night,

See you soon,

Teo

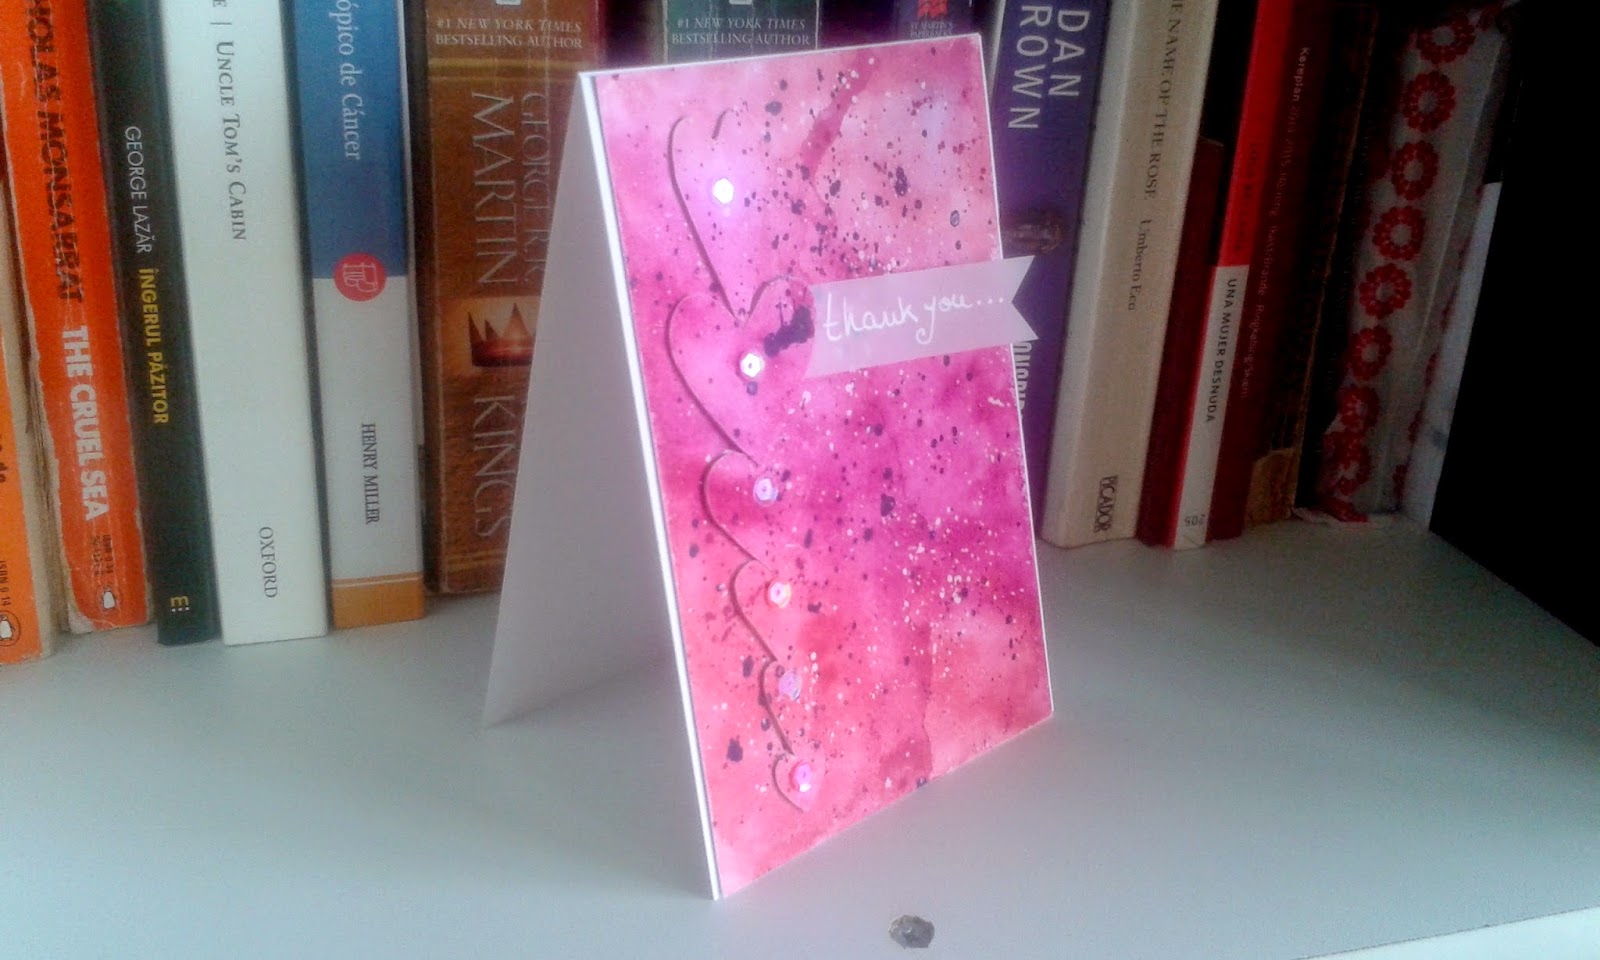
Thank you Card


I have created this card for a friend of mine that has helped me a lot through the years i have spent here in Denmark. 
The background is a watercolour piece done on watercolour paper, finished with splotches of purple, white and pinkish red. At first i wasn't quite sure what i would use it for but then i started playing with a stencil i bought from Panduro in a set of 4. I started drawing the big hearts on a piece of scrap watercolour paper and after that i cut them all and finally arranged them in a singular column pattern as seen in the pictures. I then moved to the background piece and drew the hearts in the order i chose and then used my cutting knife to trace them without damaging the paper or the pieces. 


Finally i sandwiched 4 scrap hearts and their respective match with Hobby MultiMedia glue from the watercolour background and glued them on a thin piece of paper that would serve as a base. For the thank you banner i wrote on a vellum strip and sandwiched it just before the last heart being the only support it has on the card. 

As a finishing touch, i used some clear and red holographic sequence that i glued on each alternating heart. The effect that is created is quite subtle but it has a nice feel to it when you first see it. 

Love You Galaxy Background


I made this card for my boyfriend and i copied the image from a Stampin Up stamps set called "Love you to the Moon" which i drew on vellum paper from Bog & Ide. The background is a watercolour piece with teal, blue and purple colours, (it has a different feel in real life, when it comes to colours) followed with white colour splashes.

The silver stars i cut from a paper with stars which i used as background for the previous card with the balloon. The stars that i placed on the vellum paper served as hiding places for the dimension squares that hold the vellum in place.

I have also entered this card in the CASology Week 144: Flight Challenge and Cards4Guyz Challenge #44 Flight.

Have a wonderful weekend all,
Teo


Happy Birthday to You

One night i had created a watercolour distress background and i was wondering what to do with it. While browsing around i found a set of dies from Simon Says Stamp called Balloons Craft Dies. I do not own a Big Shot machine to use dies so i don't have any. So i used my PC to create a basic outline of the biggest balloon and then trace it on my watercolour background so that i could cut it afterwards.

I did the same with the word "you" which i lined from a stamp i found online and then coloured in with watercolour black. The rest is self explanatory.

shine bright


A friend of mine is going though a rough patch and i have created this card for her to remind her how special she is and that she must stay strong. 

The background are rays coloured in watercolour. On top i added double vellum paper to tone it down. As a center piece i distressed watercolour paper in a diamond shape and in the middle i wrote with marker the sentiment "shine bright". Around the edges i embellished with diamond black sticky pearls. 


And i have entered this card in the Word-Art Anything Goes Challenge.